AI Agent
AI Chat Agent
The SPECTROview AI Agent is a built-in AI assistant that lets you query, filter, visualize, and modify your data using plain natural language — no coding required.
The AI Chat Agent is optional. SPECTROview works fully without it. You only need to set it up if you want to use AI-powered features.
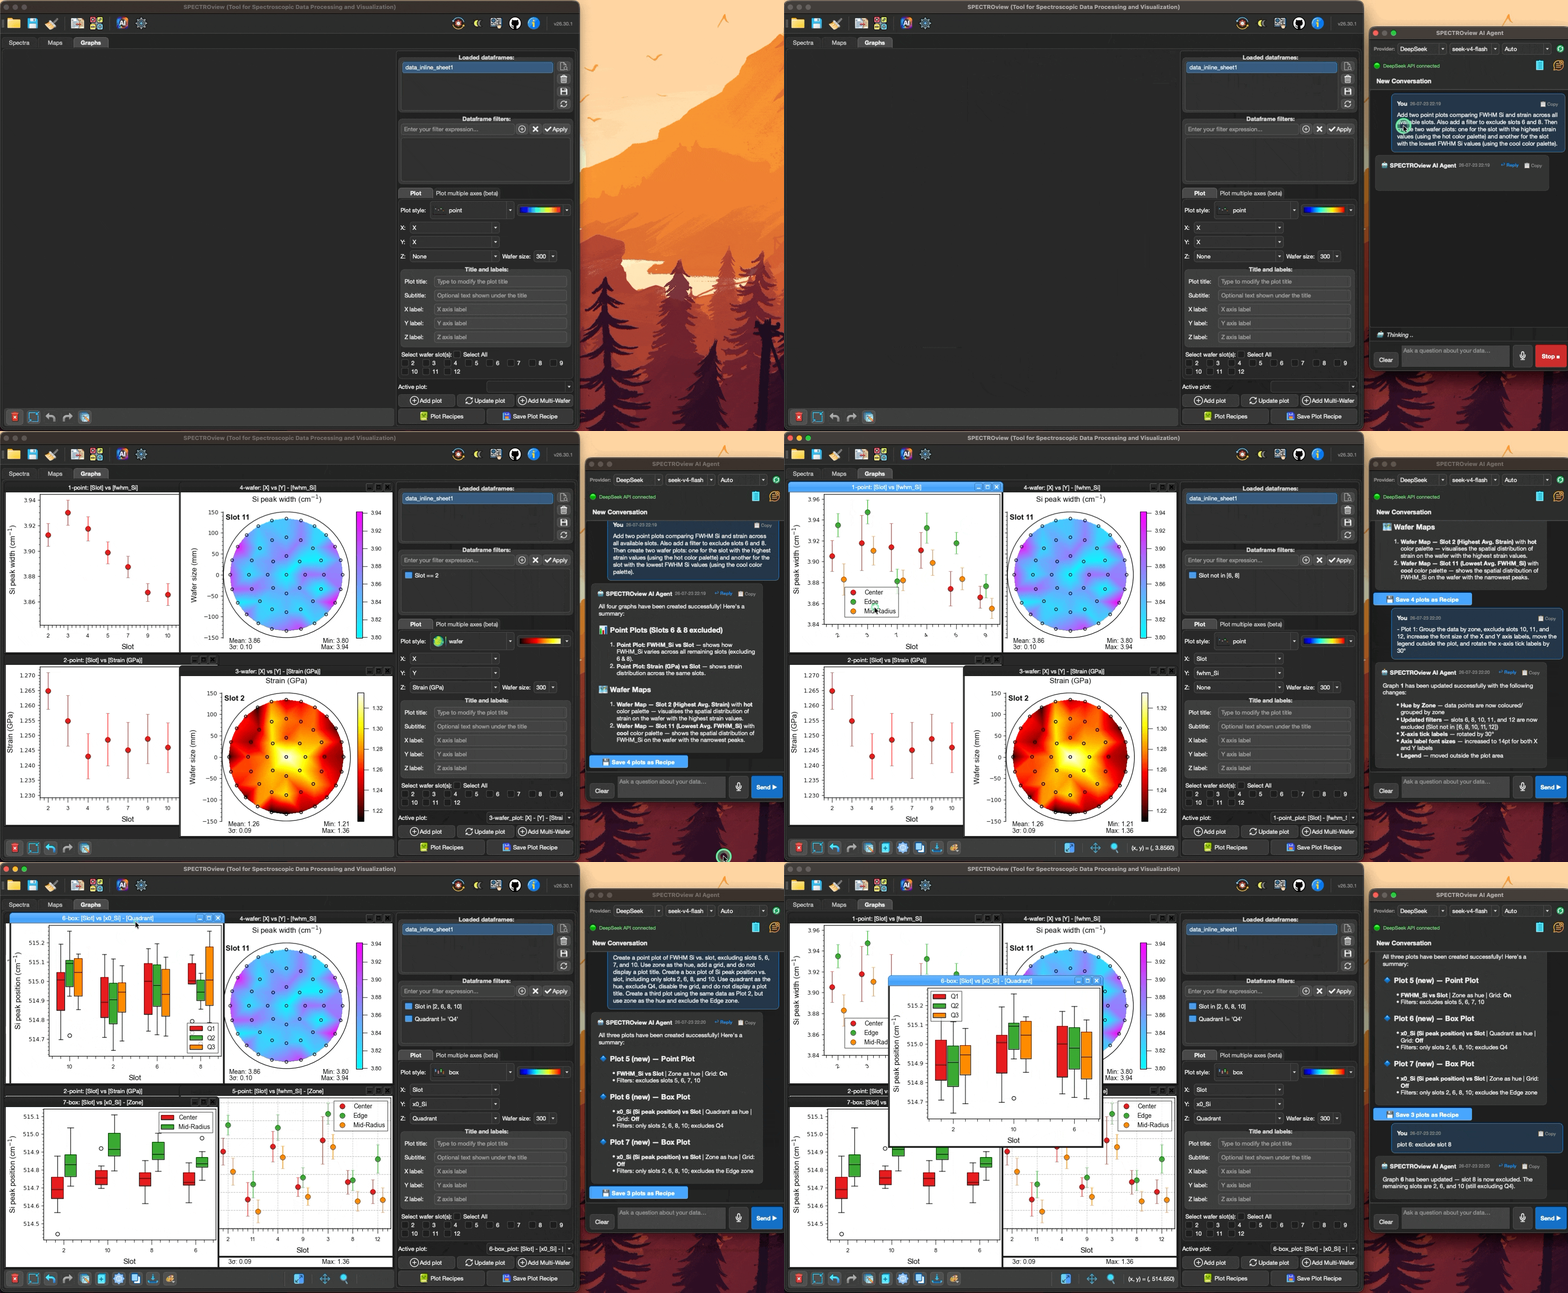
Talk to SPECTROview in plain language to filter data and create or customize plots.
1. Opening the AI Chat Agent
You can open the AI Chat panel in two ways:
- Click the AI Chat Agent button in the top menu bar.
- Use the keyboard shortcut
Ctrl + Shift + A.
2. Supported Providers
The AI Agent supports multiple LLM backends out of the box — no extra packages to install:
| Provider | Description | Requires |
|---|---|---|
| Ollama (local) | Fully local, no internet, no API key | Ollama installed and running |
| OpenAI | GPT-4o, GPT-4o-mini, etc. | API key |
| DeepSeek | Cost-effective, high-quality reasoning | DeepSeek API key |
| Gemini | Google Gemini models | Gemini API key |
| Mistral | Mistral AI models | Mistral API key |
| Anthropic | Claude models | Anthropic API key |
| Custom | Any OpenAI-compatible endpoint (e.g. an internal/institutional server) | Base URL + API key |
Note: DeepSeek, Gemini, and other OpenAI-compatible providers all use the
openaiPython package as a generic networking client. You are not sending data to OpenAI — only the package is reused as a universal API tool.
3. Configuring a Provider
- Select a Provider from the dropdown on the top-left of the chat panel.
- For cloud providers, enter your API key in the Settings panel (
Ctrl + Shift + S→ AI tab): - The Custom provider's Custom API Key, Base URL, and Model Name fields are shown by default.
- OpenAI, Anthropic, Gemini, DeepSeek, and Mistral keys are tucked under the collapsed ▸ Other cloud providers section — click it to expand.
- For the Custom provider, fill in the Base URL (the endpoint's OpenAI-compatible URL).
- Choose a Model from the model dropdown next to the provider. The dropdown is editable — if the model you want is not listed, just type its name in.
- Click the ⟳ refresh icon to verify the connection. A green status indicator confirms it is working.
Model Name: Some endpoints (custom ones especially) do not expose a model-listing API, so the dropdown starts empty. Enter the model names you use in Settings → AI tab → Model Name as a comma-separated list (e.g.
model-a, model-b). They then appear in the dropdown for the Custom provider and are remembered between sessions.
4. Prompt Tier for Local Models (Auto / Full / Simplified)
Next to the model dropdown is a small prompt tier selector: Auto, Full prompt, or Simplified prompt. It only affects local Ollama models.
Small local models (roughly under ~10 billion parameters — things like qwen3:8b, gemma3:4b, phi3:mini) are noticeably less reliable with a long, information-dense prompt than a large cloud model is. To compensate, SPECTROview can automatically give small models a shorter, more focused prompt, a smaller conversation-history window, and tuned generation settings — while leaving larger models completely untouched.
| Option | What it does |
|---|---|
| Auto (default) | SPECTROview checks the size of the selected Ollama model and automatically picks the right prompt for it. No action needed — this is the recommended setting for almost everyone. |
| Full prompt | Always use the full, detailed prompt, even for a small model. Useful for comparing behavior, or if a "small" model is actually working fine as-is. |
| Simplified prompt | Always use the shorter, small-model-optimized prompt, even for a large model. Useful if a specific model is struggling despite being large, or if you want faster responses. |
When Simplified mode is active, the status bar shows · Simplified prompts next to the connection indicator, so you can always tell which mode you're in.
If a local model isn't calling tools correctly (e.g. it describes what it would plot instead of actually creating the plot, or drops a setting like grid lines), try switching this selector to Simplified prompt — even if Auto didn't pick it automatically for that model — before assuming the model can't do the task at all.
5. Chat Interface Overview
The chat panel shows messages in chronological order with clear color-coded bubbles:
- 🔵 Blue bubble — Your messages (User)
- 🟢 Green bubble — AI Agent replies
- 🔴 Red bubble — Error messages
Each bubble shows the timestamp (YY-MM-DD HH:MM) and action buttons:
- 📋 Copy — Copy the message text to clipboard
- ↩ Reply (AI messages only) — Reply specifically to that AI message
🎤 Voice Dictation (Optional)
You can use the microphone button in the input bar to dictate your queries instead of typing them. This feature requires optional dependencies:
If these are not installed, the microphone button will still appear but will show an error message when clicked instructing you to install them.6. What the AI Agent Can Do
The AI Agent has full awareness of your loaded DataFrames and open graphs. It can:
- Filter data: Show rows matching any condition
- Compute statistics: Mean, std, min, max, percentiles
- Create plots: Generate any of the 9 supported plot styles
- Modify graphs: Update axis ranges, titles, colors, filters
- Delete graphs: Remove specific or all open graphs
- Answer questions: Explain column contents, suggest analysis steps
The agent always knows your DataFrame names and every column name and type. It looks up the rest — example values from a column, or a graph's exact current settings — only when a question needs them, so ordinary requests stay fast.
7. Prompt Examples
🚀 Complex / Combined Prompts
The real strength of the agent is handling rich, multi-step requests in a single message — analyze the data, create several graphs, and fine-tune their appearance all at once.
Analyze, then plot:
Compute the mean and std of center_Si per Zone, then create a bar plot of the
per-Zone mean with error bars from the std, sorted from highest to lowest.
Find the wafer with the highest average FWHM_Si, filter to just that wafer, and
plot a wafer map of its FWHM_Si.
Multiple graphs in one prompt:
Create three graphs: a scatter of Slot vs center_Si colored by Zone, a box plot
of center_Si grouped by Zone, and a histogram of center_Si with 40 bins.
Plot and customize in the same request:
Make a scatter plot of Slot vs center_Si colored by Zone, set the title to
"Si peak position", label the Y-axis "Raman shift (cm⁻¹)", set the Y range to
[520, 522], use the viridis palette, and turn on the grid.
Plot FWHM_Si vs temperature as a trendline, filter to Zone == "center", move the
legend to the upper right, and use a log scale on the X-axis.
Everything together:
Filter the data to R_squared > 0.95, then create a scatter plot and a box plot
of center_Si vs Zone side by side, colored by wafer, both with the title
"High-quality fits only" and the grid enabled.
🧩 Simple / Single-Action Prompts
Good starting points that each do one thing — filter, summarize, plot, tweak, or ask. Combine them freely into the complex prompts above.
(Note: Wafer and 2Dmap plots require your dataset to have spatial X and Y coordinate columns).8. Conversation History
The AI Agent remembers your conversation across multiple turns:
User: Show rows where FWHM > 5
AI:   Found 42 rows...

User: Now create a scatter plot of Slot vs center_Si for those rows
AI:   (creates scatter plot with FWHM > 5 filter applied)
- The chat history is preserved when you load new files or switch datasets — it only resets when you click ➕ New Chat.
- Past conversations are automatically saved and can be reopened from the History panel (📋 button).
- Use ↩ Reply on any AI message to specifically respond to that turn.
9. Tips & Best Practices
- Be specific about column names — the AI knows your column names, but using the exact name avoids confusion.
- Reference graph IDs — when modifying or deleting graphs, check the graph ID shown in its title bar.
- Start simple — ask for a basic plot first, then refine it in follow-up messages.
- Multiple plots at once — request several styles in one prompt: "Create a box and scatter plot of X vs Y".
- Check the status bar — a 🔴 red indicator means the connection is not working. Check your API key in Settings or verify Ollama is running.
- Struggling local model? — try forcing Simplified prompt (see section 4), keep requests to one or two plots per message, and prefer models that are explicitly documented as supporting tool/function calling.
10. Troubleshooting a "Connection error."
If a cloud/custom provider replies with "Connection error.", the app couldn't establish the network connection at all (it is not a wrong model name or an expired key — those report differently). Common causes:
- Wrong Base URL — for a Custom provider, double-check the Base URL in Settings. It must be the endpoint's OpenAI-compatible root (e.g.
https://host/v1orhttps://host/openai/), not the full.../chat/completionspath. - Corporate / internal endpoint with a private certificate — an on-premise endpoint (e.g.
https://…intra.company…/) is often secured by a company certificate authority that Python doesn't trust by default, producing a hidden certificate verify failed error. SPECTROview handles this automatically by trusting your operating system's certificate store (via thetruststorepackage, installed by default). If it still fails, point the app at your organization's certificate bundle by setting the environment variableSSL_CERT_FILEto your.pemfile (e.g.chain_bundle.pem) before launching. - Off the network / VPN — an internal endpoint is only reachable from the corporate network or VPN.
The error card now shows the underlying cause (e.g. CERTIFICATE_VERIFY_FAILED, getaddrinfo failed) beneath the summary, which tells you which of the above applies.
11. Keyboard Shortcuts
| Shortcut | Action |
|---|---|
Ctrl + Shift + A |
Open AI Chat Agent |
Enter |
Send message |
Shift + Enter |
New line in input box |